Wednesday, 25 July 2018

Weekly Blog Post for Bumbleberrys using the latest MFT release Saddle Up and Celebrate....

Well Hello Crafty Friends,
What amazing weather were having, a little to hot for me. Unless I was on a beach in a beautiful location.
Talking of holidays the boss is back now, so things will be all back to normal.
On the crafty front, I was eagerly awaiting my fix of MFT this month and they didn't disappoint.

My first favourite is the Saddle Up and Celebrate, https://www.bumbleberrys.co.uk/products/bb-saddle-up-celebrate

I could wait to play with this set, this is what I came up with.


Step One


Stamp out the Cake, mask it off. Then stamp the Cowboy and Cow girl.


Step Two


Mask them and carry on building your scene.


 Step Three

Mask everything off, by stamping on to masking paper and fussy cutting them out.


Step Four

Using the Drifts and Hills stencil and Fray Burlap Distress Oxide, 

Step Five

Do the same with the Mini Cloud Edges
stencil with Wild Honey and Spiced Marmalade. this will create the sunset cloudy sky.


Step Six

Peel off all the masks


Step Seven

Stamp out the boy and girl bandana on a piece of MFT Tiny Check 6x6 paper.

 Step Eight
Fussy cut them , then stick them on.


Step Nine
Stamp out wheel image and add detail with fine line markers in browns on to floor of card.


Step Ten
Colour your images, embellish with Glossy Accents.
Added sentiment.

I think this Birdie Brown set is fantastic, as her characters are adorable and the font she always uses can be mixed and matched with all the designs.
This is why I chose her stamps to do the magazine commission.
I hope you have enjoyed today's blog
Take care in this heat
God bless
Jo
xxx


Tuesday, 17 July 2018

Weekly Blog for Bumbleberrys.......Using Gina K Designs Stamps And Some Amazing News.

Hi There Crafty Friends,
I am bursting to tell you my amazing news.
Bumbleberrys were approach a few months ago, buy Die-Cutting Essentials. To do a feature for their magazine.
I was asked if I would like to design a set of 5 cards.
I was over the moon, after all these years I would finally reach my dream, of being in print.
I have had to keep this a secret for sooooo long. The Magazine is out this week. Issue Number 40. I can now shout it from the roof tops, or the hills near my house. Roof tops is a bit scary!
I have been super excited and have had a ridiculous grin on my face for days.


Well now i've got that out my system, I will carry on with today's blog post....


This weeks card involves two techniques, one on making a background with Distress Oxides. The other with a Bleaching technique.

Step one

To make the background, use a craft mat and stamp out your oxide ink pads on to it. Choose colours that will work together. Here I used Candied Apple,Carved Pumpkin, and Fossilized Amber.
Spritz them with water and using water colour paper pick up the ink, dry with a heat tool between layers.
Tim Holtz has some amazing demos on you tube for this technique.
I then added white splatters with copic opaque white.(any acrylic white paint would work.) 

Step two


I then stamped the Rose in Versafine ink and embossed in clear embossing powder.

Step Three


I used household bleach and an old brush to bleach the colour off the rose, to make it pop.
Step Four


I stamped and embossed the sentiment from the set. Then
I mat and layered, it on to black card stock, why the bleach was drying.
Then on to a card blank, added some Nuvo drops.
After a second go with the bleach the image became much whittier.

Here's  the end result.

I hope you enjoyed this weeks blog, i'll be back next week with the latest release from MFT.


God Bless
Jo
xxx


Wednesday, 11 July 2018

This Weekly Blog Post for Bumbleberrys..... Using Avery Elle Stamp and Dies.

Well Hi There Crafty Friends,
Hope all is well in your nook of the woods.
As for Middlesex , the weather has been a little cooler, over the past 36 hours or so. But still hitting 24 Degrees. 
Not fun if you have to work in it,  evening it has been even to hot to craft!!!! Shock!!! Horror!!!

So what is today's blog featuring, well it was time to play with some beautiful stamps from Avery Elle, Peek -A- Boo- Pals, https://www.bumbleberrys.co.uk/collections/avery-elle/products/peek-a-boo-pals-clear-stamps?variant=12457385558098
Also using the Avery Elle Circle Frame Die

This is what I came up with.


Step One

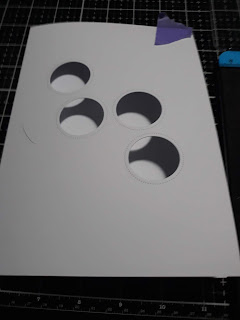
Taking the circle frame die cut into an A5 card blank.

Step Two


Using Salty Ocean Distress Oxide , blend around the circle windows. place a piece of copier paper underneath so not to ruin the inside of your card blank.

Step Three


Stamp and Colour your images, in this case I used Alcohol Markers.

Step Four


Die Cut your images and Place them on to the card blank, so the animals are popping out the windows.

Step Five


When completely happy with arangmant, stick in to place.
Then die cut letters to match your sentiment.
Now start added embellishments.
I used washi tape by doodlebug designs.
(We are now stocking Doodlebug Designs)

Step Six


Adding final touches, using Doodlebug mini heart stickers in white.
and Studio Katia (April Crystals)
I do hope you enjoy this weeks blog post as much as I love bring so ideas and inspiration your way.

BIG NEWS!!!!!

Coming out,  on the 19th July, I will be doing a feature in Die Cuts Essential Magazine (no 40.)
Using Stamps and Dies from MFT Rain or Shine Set.We Have these in the shop.
There will be  5 separate cards.

Take care, Happy Crafting
God Bless
Jo
xxx


Wednesday, 4 July 2018

Weekly Post for Bumbleberrys using ...........MFT Stamps Toucan Do It and Heffy Doodle Mask Unbe-leaf-able.

Well Welcome Back Crafty Friends,
I do hope you're enjoying this beautiful weather, and England winning last nights football to Columbia.
Penalty shoot outs are not England's best attribute, but those boys did us proud last night. Well back to the important stuff!!!! lol
Crafty Time, playing with My Favourite Things, Toucan Do It Stamp Set, https://www.bumbleberrys.co.uk/products/toucan-do-it
Im totally in love with these little bird stamps. With there sweatbands on. They look their ready for the gym.
Teamed up with the lovely stencil from Heffy Doodles, Unbe-leaf-able, https://www.bumbleberrys.co.uk/products/unbeleafable-stencil
This is what I came up with. A quick and easy design.


Step One

Making the background using stencil, and Twisted Citron, Lucky clover distress oxides, I first used the Twisted Citron in the middle then blended in Lucky clover around the outsides of the stencil.


Step Two
I then Die cut out two circles, one larger than the other from MFT Stitched Circle Stax. 


I then stamped and coloured my images using my Prisma coloured pencils.
Die cut them out and set them aside to concentrate on the middle of my card where the sentiment was going to be.
On the smaller circle I stamp to sentiments, in a mixture of the same Distress oxide ink pads as used for the back ground.
I found I could manipulate them around the acrylic block so to fit in nicely on the white middle circle.
I then added to leaves from the stamp set on to the larger circle using Versamark inkpad for a watermark affect.
Finally using an Arteza fine liner in two different greens I went around the outside.
.


This would be great for a gym buddy or a fellow Zumba queen.

Thank you for popping over, please leave a comment and Ill get back to you.

God Bless
Jo
xxx


Followers