Wednesday 26 January 2022

Mass Production Of Birthday Cards Using Make A Wish Stamp Set From Concord & 9th

 Well Hello and Welcome

This is a busy week in the Summers Household with Husband, Two Daughters and Granddaughter all celebrating their birthdays. Also its exactly a month since Christmas. 

So that's four cards in one sitting.


Products

Make A Wish Stamp Set (Concord & 9th)

Inks (Gina K) in Red Hot, Sweet Mango, Wild Dandelion, Key Lime, Sea Glass,
Wild Lilac (Rainbow Colour Card)

Amelia Card Passionate Pink and Bubblegum.(Gina K)
Shaker Cover (Waffle Flower)
Sequin Mix (Taylored Expressions)
Letter and Number Dies (MFT)


Blue Card Sea Glass and Ocean Mist (Gina K)

All Cards

Black Amalgam Ink (Gina K)

Crystal Glaze (Nuvo) 

White Jelly Pen (Sakura)

Card Blanks Various

Method
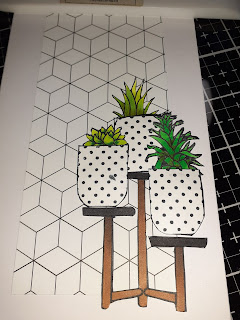
Stamp out the candle image as many times as you require.


Then using the solid stamps add the flame in yellow ink (Wild Dandelion)
Then add the solid candle image in your desired colour.

Rainbow Design


Blue Card This is on a 5 x7 piece of cardstock where the candles are stamped at random.

Stamped in Sea Glass


Then choose a pattern and stamp in a darker colour. (Ocean Mist)


Bubblegum and Passionate Pink


Add a little red ink on your yellow candle then add crystal glaze.
(Later I realised there is a little flame image, that if you stamp in red creates the realistic look.


Add any words from the stamp set. 


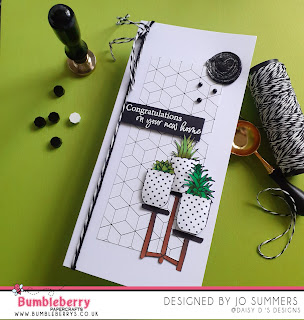
This one I personalised with Name and Number dies and turned in to a shaker with the amazing shaker covers from Waffle Flower. All you do is remove three sides add them over your design and before sticking down the last sticky flap place in your shaker mix.


This one I matted on to black card stock an added Nuvo drops in rainbow colours. I stamped the sentiment on to black card stock with clear embossing ink and sprinkled it with white embossing powder. Lastly I used a jelly roll pen for the high lights.


This card, I stamped on to white card stock in black Ink to create the sentiment. Added a few black enamel dots. Also using the jelly pen 
on the candles for high lights.

I do hope you've enjoyed a little look at these different designs same stamp set.

Why not show us what you come up with on our Facebook group we love seeing your work.

Happy Paper Crafting 
Jo
xxx


Wednesday 19 January 2022

 Hello And Welcome Back,

As promised I'm back this week, with another project using the amazing wax stamps.

Products

Bicycle Builder Die (Honey Bee Stamps)

https://www.bumbleberrys.co.uk/collections/honey-bee-stamps/products/bicycle-builder-honey-cutshbs

Happy Plants Stamps (Honey Bee Stamps)

https://www.bumbleberrys.co.uk/collections/honey-bee-stamps/products/happy-plants-6x8-stamp-set-hbs 

Rooting For You (Honey Bee Stamps)

https://www.bumbleberrys.co.uk/collections/honey-bee-stamps/products/rooting-for-you-6x6-stamp-set-hbs 

Hugs and Kisses Paper Pack (Honey Bee Stamps)

https://www.bumbleberrys.co.uk/collections/honey-bee-stamps/products/hugs-and-kisses-paper-pad-6x6-24-double-sided-sheets-hbs 

Hugs and Kisses Honeycomb Wax Melts (Honey Bee Stamps)

https://www.bumbleberrys.co.uk/collections/honey-bee-stamps/products/bee-creative-honeycomb-wax-melts-hugs-kisses-hbs 

Hugs and Kisses Gem Stickers (Honey Bee Stamps)

https://www.bumbleberrys.co.uk/collections/honey-bee-stamps/products/hugs-and-kisses-gem-stickers-210-count-hbs 

Cardstock in Grapefruit and Aqua Sky (Concord &  9th)

Little Heart Punch or Die

Copic Markers in R32, and B000

Polychromo Pencil in Green

6 x 6 Inch Squared Card Blank

Method

Firstly heat up three little waxes. 

I added red but later ,did this with two aqua and one pink. Once melted I poured on to a heat resistant mat. Using the wax stamp I pressed into the wax and left it to the side.


Next I started on my card.
I cut your pattered paper to 5 1/2 " Squared and attach to my card blank.


Next I die cut my bike wheel out of  coloured cardstock.


Then out of white cardstock.


The white wheel was attached to the coloured wheel to give it dimension.
Attached your bike to your card front. I also die cut the frame and handle bars.


I added the basket. I used my alcohol markers to shade my basket.


At this point I added my wax stamp embellishment.


Next I stamped the sentiment, and mattered it on to aqua card stock.


To finish my design, I punch out little hearts from the white card stock and using the same colours I coloured my lilies to colour them.
lastly I added a few of the gem stickers.


Thank you for Popping Bye,

Happy Paper Crafting

Jo

xxx


Wednesday 12 January 2022

Using Wax Seals On Your Card Designs!

 Hello and Welcome, 

I hope you all had a Very Happy Christmas and A Great New Year.

Today I'm showing a different way to using the wax seals. Which have become popular over the past few months and Altenew was the first. Now Honeybee Stamps have just release theirs with some lovely waxes.


Products

Happy Plants Stamps (Honey Bee Stamps)

Rooting For You Stamps (Honey Bee Stamps)

Bee Creative Wax Stamper Set Heart (Honey Bee Stamps)

Bee Creative Honey Comb Wax Melts

Hugs and Kisses Paper Pad (Honey Bee Stamps)

The Bee's Knee's Paper Pack (Honey Bee Stamps)

Gem Stickers Back to Basics (Honey Bee Stamps)

Copic Markers in YG3, YG17, AND YG67
G5  YG9 (Plants)
E37, E79 AND 100 (Plant Stand)
WO AND W2 (Plant Pots)

Embossing Pad (Any)
White Embossing Powder (Any)
Alcohol / Copic friendly Black inkpad (Any)
Black Twine (Any)
Glacier Paste Quick Silver (Nuvo)
Slimline Card Blank

Method
Stamp in Copic friendly ink and colour your images.


Choose your backing paper and cut to size you would like.


Attach your plant stand directly on to the bottom corner of your backing paper. Then using mounting foam tape raise up the pots and attach them on to the stand.


Stamp in embossing pad and emboss in white on to a piece of card your sentiment.


Cut it down using a trimmer and add you twine.


Heat up 3 Hexagon waxes in black, once melted pour on to your chosen place on your project. Then place stamp firmly in to melted wax.


If you have any wax over you can create wax dots. Then using a little Glacier Paste on your finger rub over wax image to highlight the Heart. 


I will be showing more cards with Wax Seal's as they are not only good for sealing envelopes. They make great embellishments to.

Happy Paper Crafting
Jo
xxx


Followers