Wednesday 24 February 2021

Little Die, "Big Impact!!!" with MFT Be Happy Die Namic's

Well Hello There, I hope your all well.

Todays Cards are made using, minimal products.

But I think you will agree with me, they pack a punch.


Products

Be Happy Die Namic's  (My Favorite Things)

https://www.bumbleberrys.co.uk/collections/my-favorite-things/products/die-namics-be-happy

Magical Rainbow Die Namic's  (My Favorite Things)

https://www.bumbleberrys.co.uk/collections/my-favorite-things/products/die-namics-magical-rainbow?variant=29413938659410

Little Cloud Dies ( any Company)

Various Cardstocks from (Lawn Fawn, Chilli Pepper, Fake Tan, Sugar Plum,)

(Gina K, Wild Dandelion. Key Lime, Tranquil Teal,)

Concord and 9th (Aqua Sky, for the clouds)

Connect Glue from Gina K

Repositionable Tape Runner

Nuvo Drops in Gloss in Rainbow Colour's.

Glitter Pen (Crafters Companion)

Nuvo Cristal Glaze ( or Glossy Accents)

Gold Hearts (Doodlebug)

Black liquorice  Card Stock (Lawn Fawn)

White Embossing Powder

5" x 5" Card Blanks

Method

First using your coloured cardstock, cut out all the colours of your rainbow. Six different colours. I separated each layer in to bowls.

Taking one of the die cut negatives, I stuck it to a piece of printer paper, with repositionable glue runner.

I filled the inside of it with connect liquid glue, and slowly layered each arch of the rainbow in the rainbow order colours.

I then removed the negative die cut.

I carried on putting down the negative, and filling all the rainbows with all six colours.

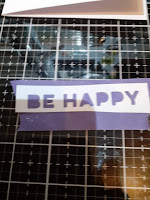
I then carefully cut them out, slightly under the die cut so you couldn't see the printer paper. The next thing was to die cut the Be Happy Die from the same rainbow colours of cardstock. using purple tape under the negative I slowly added the letters back in rainbow order. 


I then used another piece of purple tape to pick the little words up. (Press and Seel works well.)

I also cut out the clouds at this point.


I loved the scraps of the word die so much I used them as well adding Nuvo drops for the centre's of the letters. Next I stamped and Embossed some MFT sentiments, to go with the theme.

I was having so much fun I made eight cards in total, ready to cheer up some family and friends. This is my Favorite three. (excuse the pun)


Thank you for poping over, I hope you enjoyed my blog post this week.

Happy Stamping

Jo

xxx

Wednesday 17 February 2021

Air Hugs Till We Can Bear Hugs, (Birdie Brown) My Favorite Things Stamps Used On Three Separate Projects.

 Well Hello There,

This weeks blog has three projects to share with you. As many of you may know I'm the biggest Birdie Brown lover, her style just melts me and this stamp set was no exception.


Once I starting colour these image, I couldn't stop!


Products

Hug It Out  Stamp Set (My Favorite Things)

https://www.bumbleberrys.co.uk/collections/my-favorite-things/products/bb-hug-it-out

Card One (Softer Rainbow)

Lawn Fawn Inkpads in Lobster, Fake Tan, Sunflower, Fresh Cut Grass, Mermaid and Juice Box

Card Two (Rainbow Clouds)

Distress Oxides (Ranger) in Abandoned Coral, Spiced Marmalade, Mustard Seed, Twisted Citron, Peacock Feathers, and Wilted Violet.

Cloud Stencil ( My Favourite Things) 

https://www.bumbleberrys.co.uk/collections/my-favorite-things/products/stencil-cloud

Tag 

Distress Oxide (Ranger) Spun Sugar

Lots Of Hearts Stencil (My Favourite Things)

https://www.bumbleberrys.co.uk/collections/my-favorite-things/products/stencil-lots-of-hearts?variant=21250766110802


All Projects

 Used Masking Paper, Neenah 80lb cardstock, Memento Ink in black, White Jelly Roll pen for high lights and Polychromos Pencils.

Various Gems, Ribbon, Nuvo and Twine


Method

Card One

First I stamped my image on to my cardstock, plus the sentiment using Memento ink. Then I stamped it on to masking paper.

I placed the masking paper over the image, and using my blending brushes started to blend on the lawn fawn ink colours in a rainbow order.


I then removed the masking paper and coloured my image.


I notice i had a hay low affect around my image so pencilled around it with matching pencil colours to my inks.


Lastly I added little clear Heart Gems from Little Things From Lucy's Cards.


Tied some doodle bug twine around to finish the look.


This Is a top folding card.


 Tag 

I did exactly the same, I used the heart stencil and oxide ink instead of the rainbow.


Card Two 

Same as first card, stamped and masked the stencil rainbow clouds, coming down the cardstock.

I hope you've enjoyed todays blog post,

Happy Stamping

Jo

x

Wednesday 10 February 2021

Two for One and Double Stencilling, using the Heart Extraordinaire Stencil by My Favorite Things (Valentines Post)

 Hi There Crafty Friends, 

Sunday the 14th  of February, is the day we celebrate Valentines Day. So this weeks blog is along that theme.

Stencils are becoming the favourite way, to create the most amazing projects. As they are very versatile and their price point is much lower.

Today I use the stencil in two different ways to create two very different valentines cards.


Products

Heart Extraordinaire Stencil My Favorite Things

https://www.bumbleberrys.co.uk/collections/my-favorite-things/products/heart-extraordinaire-stencil


Lots Of Hearts Stencil My Favorite Things (Love Card)

https://www.bumbleberrys.co.uk/collections/my-favorite-things/products/stencil-lots-of-hearts

Lots Of Love Die Namic My Favorite Things (Love Card)

https://www.bumbleberrys.co.uk/collections/my-favorite-things/products/die-namics-lots-of-love?variant=31796725940306

Cosmic Shimmer Luna Paste (Moonlight Shimmer)

Silver Mirror Card Stock (Any)

Distress Oxide Ink (Ranger) Spun Sugar, and Picked Raspberry


Full of Hearts Stencil My Favorite Things (I Love You Card)

https://www.bumbleberrys.co.uk/collections/my-favorite-things/products/stencil-full-of-heart

From The Heart Stamps My Favorite Things (I love You Card)

https://www.bumbleberrys.co.uk/collections/my-favorite-things/products/from-the-heart

Nuvo Glimmer Paste (Moonstone)

Distress  Oxide Ink (Ranger) Abandoned Coral, and Barn Door

Black Card Stock (Any)

Detail White Embossing Powder (Any)

Both Cards Use

 C6 Card Blanks

Neenah 80lb Cardstock cut to 4" x 5 3/4"

Method 

Love Card


First cut you neenah cardstock or similar to size so it fits on an C6 card blank.


Firstly Lay down the heart mask, put a little removeable tape on the back of the mask. Centre it to the upper area on your cardstock.


Then slowly go around the mask with the lightest of your oxide inks and a blender brush.
Making sure it is darker around the heart mask, so to high light the shape.


Place the Loads of Hearts stencil over the top, do not remove the heart mask.
Using a spatula apply the Luna paste, over the top of the who of your cardstock.
 Then slowly remove the stencil and then the mask and leave to dry at least a few hours.
Die cut your Lots of Love die out of silver mirror card, and a couple out of white card to add demention, stack them together putting the silver on top. I used three white, layers then my silver.


I love you card


Place down the stencil, and using your oxide lightest colour first blend to create your heart.

Leaving your stencil in place, add the Full Of Hearts Stencil over the top.
Using the Nuvo paste and spatula apply a thin coat over the heart section of your work. The surrounding area is mask off by the first stencil, so don't worry about getting it in the wrong place.


Cards drying

Remove all masks and set aside to dry.
Stamp your sentiment on to black card stock and emboss in white powder.
Trim sentiment  to fit.


I do hope you've enjoy todays blog 
Take Care and Happy Stamping
Jo
x


Wednesday 3 February 2021

The Importance Of Alphabet Dies To Personalise Your Cards, using Concord and 9th Product (All The Letters)

      Hello There Crafty Friends,
One thing over the years, ive used over and over again is my alphabet dies.
These are a staple in any crafters stash. Not only for personalising your cards, but for sentiments. Different sizes give different impact to your designs.


Products

All the Letters Dies Concord & 9th

Playful Patterns Stamp Set

Aqua Sky, Grapefruit, and Sorbet Cardstock and Inkpads.

Oceanside Inkpad Only

Nuvo Drops in Aqua Plains and Peach Sorbet  (Jewel)

Embroidery Tread, Sequins, and Paper flower (My Stash)

Method

Firstly I cut all the rectangles out one for each letter in this case 6 letters (Olivia). I taped two dies together to speed up the cutting process. I used the different colours of the cardstock.


         I then cut out the letters in the name, out of the rectangles, making sure I centred them in the centre at at the same height.


I then lay them by a slimline card to see how they would look.


Next I took the Playful Pattern stamp set and set to work on stamping the card blank to make the background using the matching inks to cardstock.
Then I placed the letters down using a ruler to help keep them straight..


I love the look of these longer letters. 
when using inks and cardstock from the same company it makes the project come together seamlessly.

I know these alphabet dies are going to used often, and the rectangle adds a different look. But the letters can be used with out there are many possibilities.

I hope you enjoyed this weeks blog post.
Happy Stamping
Jo
xxx

Followers