Wednesday 23 February 2022

Have you ever tried stitching on a card. I have two ways on is with embroidery threads the other is faux.

 Well Hello and Welcome

I love the look of stitching on a card, but don't own a sewing machine. I decided to get the look with out the hassle. Here's how I got on.

Products

Happy Heart Stamp Set (Concord & 9th)

https://www.bumbleberrys.co.uk/collections/concord-9th/products/happy-heart-stamp-set-4x8-c9 

Happy Heart Box Dies (Concord & 9th)

https://www.bumbleberrys.co.uk/collections/concord-9th/products/happy-heart-box-dies-c9 

Black Ink Pad (Versafine)

Bubble Gum Ink Pad (Gina K)

Jelly Roll Star Dust Pen in Pink (Sakura)

6" x 6 " Black Card 

 6 x6 "  White Card Blanks

Embroidery Silks (Amazon)

Needle (Amazon)

Foam Mat for Pricking On.

Method


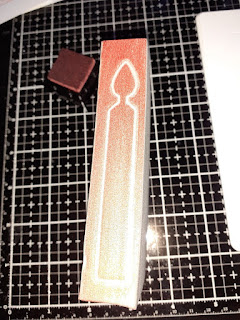
First I inked up the dotty heart stamp in bumble gum ink. Then stamped the sentiment and coloured it in with the pink jelly roll pen. Placed this on to a foam mat and went around the heart piecing holes evenly spaced.


I then die cut out the scalloped heart which already has stitching on it.


After layering the hearts together, I then re- poked the heart through again, as its easier two poke layer by layer than two layers of card together. 


After stitching this I added to a black 6 x 6 " piece of card stock. Punch holes around the mat and sewed as before.
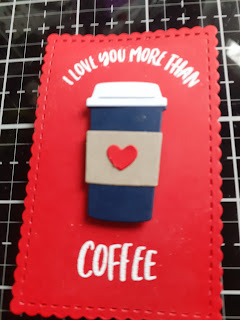
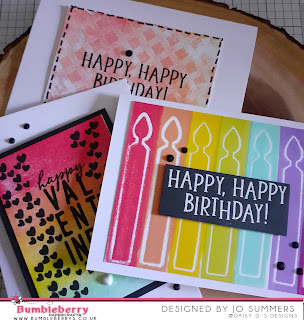
I love this different look to a card.
The other card I used a pen in black to add faux stitching.
use the pen to join up the stitching marks on the die cut.


Thank for Popping Bye 
Happy Paper Craft
Jo
xxx


Wednesday 16 February 2022

Working with Die Cuts, To Create Love Cards Not Only For Valentines.

 Well hello and Welcome

This week I am playing with the incredible Concord and 9th Release.

"Love You More Than "

I think these little cards aren't only for valentines but any time. A quirky reminder to a love one.

Products

Love You More Than Stamps  Set (Concord & 9th)

Love You More Than Dies (Concord & 9th)

Stitched Hearts Card Front Die (Concord & 9th)

Cardstock (Concord & 9th)

Crystal Glaze (Concord & 9th)

Embossing Ink Pad (Any)

Fine Detailed White Embossing Powder (Any)

Black Ink Pad To Add Greeting Inside (Any)


Method


First cut a piece of white card stock to 4 1/4" x 5 1/2"
run it trough your die cut machine with the card front die.


Next cut out the scalloped layer die and cut it out of the poppy card stock.


Next cut out the coffee cup in midnight card stock, lid out of white, band out of wheat and the little heart out of poppy.


Stamp and emboss your sentiments, in white detail embossing powder. Then build your coffee cup and attach with mounting foam.


Stamp the inside of your card blank, and attach your card front.


Add crystal glaze or glossy accents to your heart.

Here are a few more ideas that I came up with. Using the scalloped layer as a bed cover. and a combination of yummy foods.


These cards would be great for kids or adults in their lunch boxes or just as a little reminder.

I hope you enjoyed todays blog post be sure to let me know with a thumbs up.

This week is my 5th year on the Design Team, and I love it just as much as when I started.

Happy Paper Crafting  
Jo
xxx


Wednesday 9 February 2022

Quick And Simple Love Card Using Card Front Die from Concord & 9th

 Welcome Friends,

 I have a very quick and simple card today using the beautiful card front die also known as cover plate die.

Products

Stitched Hearts Card Front Die (Concord & 9th)

https://www.bumbleberrys.co.uk/collections/concord-9th/products/stitched-hearts-card-front-die-c9

Happy Heart Box Dies (Concord & 9th) Love Sentiment Die

https://www.bumbleberrys.co.uk/collections/concord-9th/products/happy-heart-box-dies-c9 

Distress Oxides (Ranger) Bumbleberrys now stock

in  Abandoned Coral

  Dried Marigold

  Scattered Straw

  Salvaged Patina

Gansi Tambi Starry Colours 

in  Red Gold no 902

Yellow Gold no 903

Light Gold no 905

Neenah 80lb Card Stock Bumbleberrys stock

Card Stock Indian Gold Pearl (Paper Box)

Metallic Pearls in Gold (Pinkfresh)

Card Blank 5 x 7"

Method


Die Cut your front panel out of Neenah 80lb cardstock.
Then blending in rainbow order down your panel, create your blends.


Once that has dried for a minute or two, splat on your gold water colours. 


Next matt and layer your panel and add your die cut sentiment from your gold cardstock.
Then add this to a 5 x 7 " card blank.


Finally add your Gold Pearls.

As promised a quick and simple card with a beautiful result.

Happy Paper Crafting

Jo


Wednesday 2 February 2022

Would You Like To Know More about Stamping Foam By Simon Hurley (Ranger) I Can Show You Some Cool Technique's.

 Good Morning / Afternoon My Crafty Friends

Today we are vising the world of stamping foam. What it is and what it does!


Simon Hurley create. Stamping Foam are mouldable foam pieces that are great for creating original and unique stamps. To use, heat foam with Heat It Craft Tool. Then, press foam into textured surface and hold in place for 5-10 seconds. Ink with Simon Hurley create. Dye Ink Pads and stamp. The foam can be reheated and remolded to use over and over again. Package contains four Simon Hurley create. Stamping Foam, each 3x4.25 inches with a 20mm depth. Imported.
I decided to try some ways. Here are my results.


Products
Stamping Foam (Simon Hurley Ranger)

Brayer (Tim Holtz Ranger) Or Speedball 

A Rainbow Of Ink Colours

I used Gina K inks in Red Hot, Sweet Mango, Wild Dandelion, Key Lime, Sea Glass, Wild Lilac, and Passionate Pink

Candle Die from Make A Wish (Concord &9th)
Happy, Happy Birthday Stamps From Make A Wish (Concord & 9th)
Happy Valentines Day and Tiny Heart Stamp from Little Love Tags Stamp Set (Concord & 9th)
Basic Plaid 3D Embossing Folder (Altenew)

Embellishments
Ebony Jewel Mix and Lily White Hearts ( Little Things From Lucy Cards)

Method
 

    There are 4 blocks in a pack each block has 2 sides and 4 smaller  sides to use. I am still using my first side on my first block. I been using over and over.

Using An Embossing Folder
I used an acrylic block to add pressure. 


Using A Die


I love using the side of the stamping foam.


Here I used my mini media mat so they all lined up.


Wipe of previous colour with a baby wipe. Then re-ink using your inkpads straight on to the foam.


Using A Brayer


ADD THE COLOURS TO THE FOAMSTRAIGHT FROM THE INKPAD, THEN USE A BRAYER TO BLEND THEM.

A Stencil

You can also take images from around your home from Wicker Baskets, Keys, Any Texture or Objects. The list is endless. Let me know if you try any on our Facebook Group.


Happy Paper Crafting
Jo
xxx


Followers