Wednesday, 25 September 2019

Four Easy Steps, Stamp, Emboss, Blend and Splat. Using The MFT Poppies Background Stamp.

Hello, and Welcome To This Week Blog Post.
I love some of the amazing, back ground stamps available. We tend to use them as the are called, for back grounds.
But as they are so beautiful , I decided to make my card and use this as a focal point.
With the weather now turning to Autumn, I brought in some autumnal tones.


Products
MFT Poppies Back Ground Stamp

MFT All About You Stamps
Bristol Smooth Card Stock
Black card Stock
Wow Opaque White Embossing Powder.
Wow Gold Embossing Powder.
Embossing Ink Pad or Versa mark
Kraft Card Blank 6 x 6
Distress Oxides in Mustard Seed
Carved Pumpkin
Candied Apples
Gold Paint ( Gansi Tambi Starry Colors)
Nuvo Drops in Red Berry
Blushing Red
Ripped Pumpkin
English Mustard
Heart Of Gold Shape Sprinkles (Doodlebug)

Method 


I place the back ground stamp, on to my class mat.
I ink it up in the embossing ink. I then bring my card stock and place it over the top.
I then use a piece of copy paper over that so I don't transfer the ink any ware else. 


The next step is to emboss the image in white embossing powder.
 I then trim it to 5 1/2" x 5 1/2""


I choose my oxide colours.


I work from left to right. Lightest colour first.


When I am happy with the colour I splat a little water, and lift of excess with kitchen roll.
Then I splat with the gold water colour paint.

Then I stamp the sentiment on to black card stock and emboss in gold.Then foam mount it on to the 
card. I also trim of the end at an angle.


Finally I add Nuvo drops and Heart sticker.

I do hope you enjoyed this post,
wishing all the best and Happy Stamping.

Jo
xxx


Wednesday, 18 September 2019

I Hope Your Birthday Is A "Splash" Using The Stamps and Dies from Sunshine and Friendship.

Morning All,
 I still had some back ground left from when I created the "Have a Sun Shiny Birthday in The Pool"
Pop on over to the blog. To find out how I came up with this back ground, using Distress Oxides and Glossy Card Stock.
So instead of wasting it, I decided to pull out the swimming pool die namics and use another set from that release.


Products

Sunshine & Friendship MFT Stamps 

Cordinating Dies

Swimming Pool Die Namics

Cute Cloud Outlines die Namics

MFT Patterned Paper (Over The Rainbow)

MFT Pattern Paper Called Fresh Squeezed Chevron. 
White Jelly Roll Pen
Alcohol Markers
Neenah 80lb 
Amalgam Ink from Gina K
Connect Glue  From Gina K
Glossy Accents
Small Pool Gems.

Method


Stamp  your images using Gina K amalgam ink or Memento Tux Black.
Then colour them with alcohol pens.


Die Cut your swimming pool die out, of your back ground paper, I preciously showed this in an earlier blog post, called "Have a Sun Shiny Birthday in The Pool" 


I then add the Chevron paper in green to a card black 6 x 6 inch and added a 5 x 5 inch piece of Neenah card stock on top.
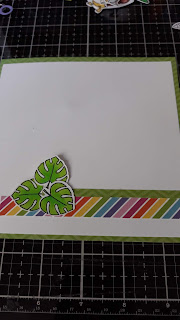
This formed the base for my pool. I cut a strip of rainbow paper and chevron, with some leaf images from the set.
  

 I then started building my scene.I used an acrylic block to hold down my pool why it dried.

I drew round the pool with a grey Alcohol marker, to add the effect of tiles..
 Keep adding bits until I was happy with the placement.


Stamped out my sentiment, on to white card stock using black ink.


I finally stuck everything down and added some small pool gems.


Thank you for popping on over
Happy Stamping 
Jo
xxx


Wednesday, 11 September 2019

There's Gnome Place Like Home....... Cute Interactive Card Using Lawn Fawn Stamps and Dies.

Well Hello Crafty Friends,
I feel so blessed to do what I do as a hobby, and create with these beautiful stamps and dies. At first I wasn't sure if I needed this cute set but then the ideas started flowing and I knew I need the Oh Gnome stamp set and Mushroom House die. Welcome Home, New Home, New Address, Happy Birthdays an Belated all sprung to mind. My son used to work away in another country, This would have made a perfect reminder that we loved him and missed him.

Right Enough Chat, lets get on with it!


Products

Lawn Fawns Oh Gnome Stamp Set

Cordinating Die

Mushroom House Die

Meadow Border Die

My Favorite Things Mini Cloud Stencil 

Distress Ink in Salty Ocean
Various Card Scraps in different colours.
Glossy Accents
White Embossing Powder
Alcohol Pens
Black Nuvo Drops
6" x 6" Card Blank

Method

Firstly I die cut out the Mushroom House,
 and used different card stocks.


I then stamped out my elements from the Oh Gnome stamp set and colored them using alcohol markers,


I then took a card blank and a piece of  51/2" x 51/2"  80lb Neenah card stock, and using the mini cloud stencil and distress oxide made up the cloudy background.

I cut out the meadow border out of green card stock and pink for the tulips.


I then die cut out the elements I had coloured and added them to my scene.
Putting Mrs Gnome behind the door.


I then stamped a sentiment on black card and embossed it in white embossing powder.
Added this and my Nuvo drops to the card.


A cute and interactive card.

Thank you for popping over its been great to see you.

Happy Stamping
Jo
xxx


Wednesday, 4 September 2019

Creating A Set Of Clean And Simple Cards, With A Monochromatic Colour Scheme.

Hi There,
Well its back to work for me, Summer Hols are over. I am please I spent a lot of crafty time sorting the craft room. I put some bits on eBay. Binned lots of junk, which I haven't used in 10 years.
I will be sharing pictures of the final results soon.

Today I'm bring you a set of three cards, with a clean and simple feel with the bonus of using a monochromatic colour scheme. 

These adorable little squirrels are from My Favorite Things (Birdie Brown) 
as you all probably know shes my favorite artist.

Products
MFT Squirrels Stamp Set


Water Brush Markers Zigs, Arteza or Similar
5 1/2 " x 5 1/2" Water Colour Paper
6" x 6 " Card Blank
Gina K Amalgam Ink
Glossy Accents
Nuvo Crystal Drops in Olive Branch.

Method


Stamp out your images, on Water Coloured Card Stock.


Choose your colours, I wanted Grey Squirrels.


Paint your images, with your pens pulling out the colour with a paint brush and water, or use a water brush.


After Die Cutting these images, I chose sentiments for each card. I stamped the sentiment and add mounting foam to the back of the images.

I then added a strip of pattern paper.
Also my Nuvo drops 


Finally I added glossy accents,
after I mounted the piece on to a 6 x 6 inch square card blank.


I do hope you enjoyed my project today

Happy Stamping
Jo
xxx


Followers